Oreo Icebox Cake

Oreo Icebox Cake is one of those delightful desserts that brings back all the nostalgic vibes. With its creamy layers of whipped filling and crunchy Oreo cookies, it’s a treat that makes every occasion feel a little bit more special. This cake requires no baking, making it a stress-free option perfect for warm days or when you’re craving something sweet but don’t want to turn on the oven. As the layers meld together in the fridge, the cookies soften to create a luscious, cake-like texture that is absolutely irresistible.
Table of Contents
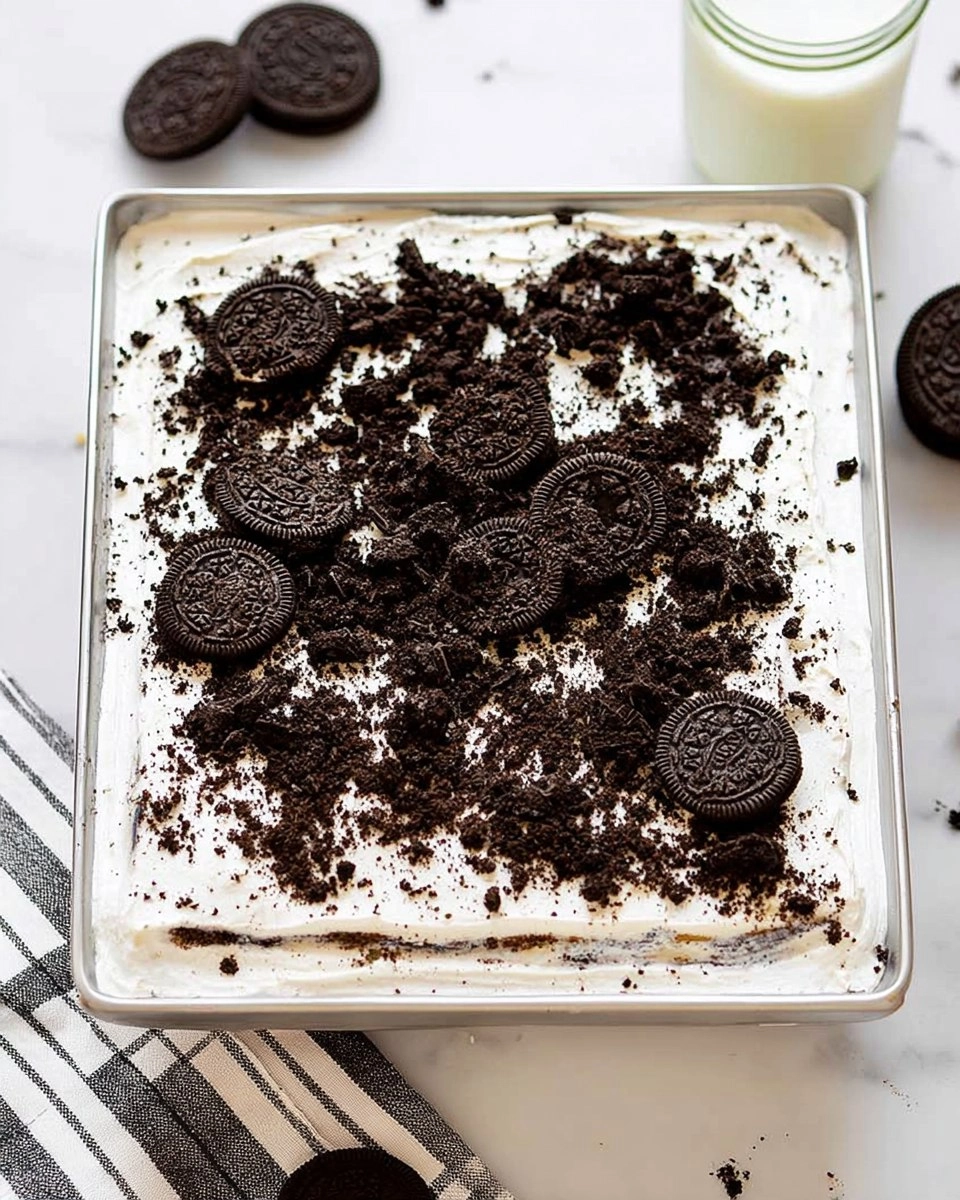
I first stumbled upon this recipe at a family gathering, where my aunt presented her version of this classic dessert. I was instantly hooked. The combination of smooth cream cheese and rich heavy cream against the familiar crunch of Oreos takes me right back to my childhood. Every scoop not only satisfies a sweet tooth but also warms the heart with memories. If you’re looking for a simple yet impressive dessert that’s bound to please a crowd, this Oreo Icebox Cake is the answer!
Why You’ll Love This Recipe
- Simple & Quick: It comes together in just minutes, and with minimal effort, you’ll be chilling a delicious dessert.
- Irresistible Flavor: The rich, creamy filling paired with the iconic crunch of Oreos creates a flavor sensation that everyone will love.
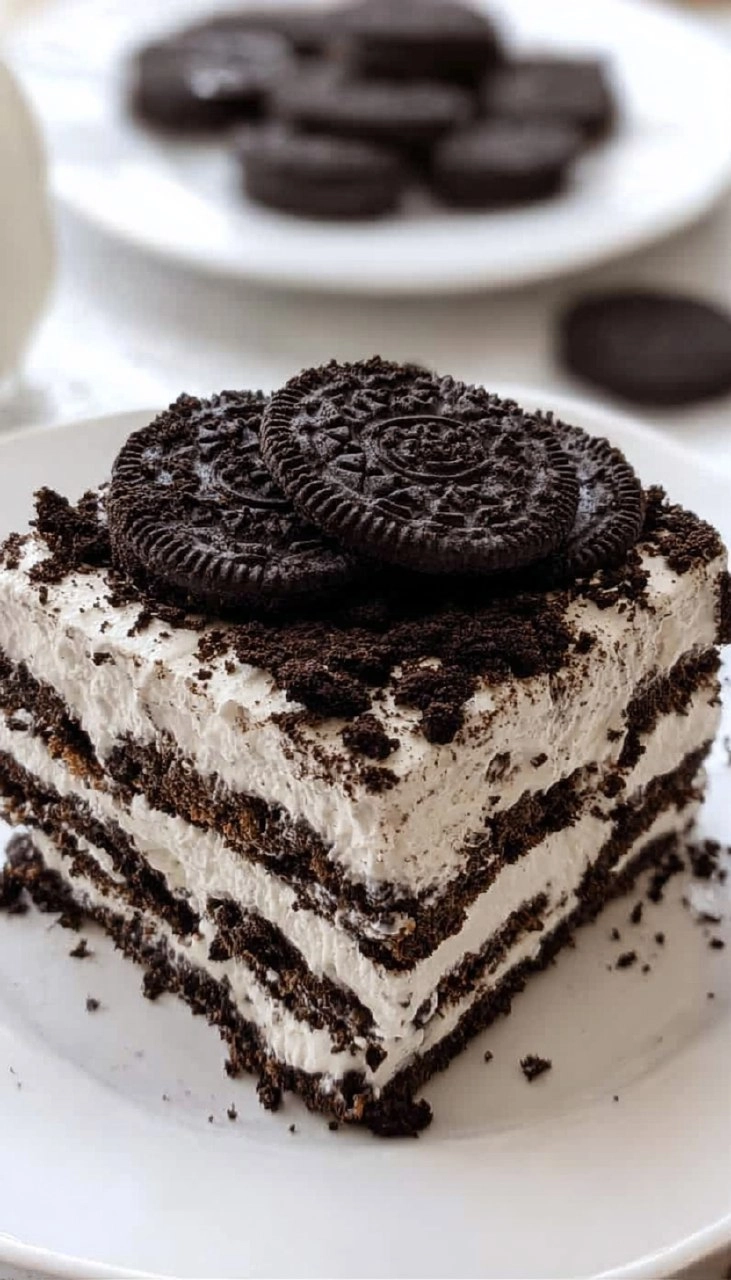
- Eye-Catching Appeal: Layered with contrasting colors and topped with crushed Oreos, it’s as much a feast for the eyes as for the palate.
- Flexible Serving: Perfect for any occasion, whether it’s a backyard barbecue, birthday party, or cozy weeknight treat.
- Diet-Friendly Options: Easy to customize; consider gluten-free Oreos for those with dietary restrictions!
Ingredients You’ll Need
- 48 Oreo cookies: The stars of the show, these provide both flavor and texture. Feel free to substitute with gluten-free Oreo cookies if desired.
- 4 ounces cream cheese, softened: This adds a rich, tangy depth to the whipped filling. For a lighter alternative, you could use Neufchâtel cheese.
- 2 ½ cups (595 g) heavy whipping cream, cold: Essential for achieving the perfect fluffy texture. Whipping cream is the best choice for stability; avoid using light cream.
- ½ cup (62.5 g) confectioners’ sugar: This sweetens the filling and helps stabilize the whipped cream. You could try powdered coconut sugar if you’re looking for a natural sweetener.
- 1 teaspoon vanilla extract: A splash adds warmth and enhances all the flavors; opt for pure vanilla for the best taste.
- Crushed Oreo cookies: Used as a final sprinkle on top for added texture and visual appeal. Save some whole cookies if you want to garnish each slice.
How to Make Oreo Icebox Cake
- Chill the Mixer: Start by placing the bowl of your stand mixer with the whisk attachment in the freezer for 15 to 20 minutes. Chilling the bowl helps to whip the cream more effectively.
- Make the Whipped Cream Mixture: In the chilled bowl, beat 4 ounces of softened cream cheese until smooth. Then add 2 ½ cups of cold heavy whipping cream, ½ cup of confectioners’ sugar, and 1 teaspoon of vanilla extract. Beat on medium-high speed until the mixture forms stiff peaks. Be careful not to overbeat, or it will turn grainy.
- Create the Base Layer: Allow about a third of the whipped cream mixture to spread a thin layer onto the bottom of an 8×8-inch baking dish. This acts as the base for the cookies.
- Layer the Cookies: Arrange a single layer of 48 Oreo cookies over the whipped cream base. Feel free to break some cookies as needed to fill in gaps; it doesn’t have to look perfect!
- Continue Layering: Spread about one-third of the remaining whipped cream mixture evenly over the cookies.
- Repeat the Process: Repeat the layering process two more times: cookies followed by whipped cream, ensuring you finish with a final layer of whipped cream on top.
- Top It Off: Sprinkle the top layer with crushed Oreo cookies. This adds a lovely texture and look!
- Chill the Cake: Cover the dish tightly with plastic wrap and refrigerate for at least 6 to 8 hours, or overnight if you can wait. As it chills, the cookies will soften, creating a wonderful cake-like consistency.
- Serve: For the cleanest slices, pop the cake in the freezer for 20 to 30 minutes before cutting. Serve cold, and watch it disappear!
Storing & Reheating
To store your Oreo Icebox Cake, it’s best to keep it refrigerated in an airtight container, where it will stay fresh for about 3-5 days. You can also freeze it for longer storage, up to 3 months. Just be sure to wrap it tightly in plastic wrap. If you plan to enjoy it later, thaw in the fridge overnight before serving. The texture will remain creamy and indulgent, but be aware that freezing might alter the cookie’s crunchiness. For a quick refresher, a brief chill in the freezer can help firm it back up before slicing.
Chef’s Helpful Tips
- Avoid overmixing when making the whipped cream; stop as soon as you hit stiff peaks to keep that airy texture.
- Make sure the heavy whipping cream is very cold. This aids in achieving the best volume and stability.
- If you’re short on time, consider making the cake in a larger pan and adjusting the baking time.
- Experiment with different flavors by adding a teaspoon of peppermint extract or coffee to the cream mixture for a unique twist.
- You can prepare this cake a day in advance to save time; the flavors meld better overnight!
There’s just something about a homemade dessert that feels warm and inviting, and this Oreo Icebox Cake is no exception. Easy to make and delightful to share, it accommodates both casual family gatherings and special celebrations alike. Whether enjoyed on a sunny afternoon or a cozy evening inside, this dessert offers a wonderful, creamy escape that invites everyone to partake.
Recipe FAQs
How long does Oreo Icebox Cake last in the refrigerator?
Oreo Icebox Cake can typically last in the refrigerator for about 3 to 5 days when stored in an airtight container. As it sits, the flavors will continue to meld, enhancing the overall taste.
Can I use different flavors of Oreos for this cake?
Absolutely! Feel free to use any flavor of Oreo cookies you like, such as mint, peanut butter, or even birthday cake. Each will give the icebox cake a new twist and excitement.
Is it necessary to chill the cake overnight?
While chilling for at least 6 to 8 hours is recommended, if you’re in a hurry, you can reduce the chilling time. However, letting it sit overnight allows the cookies to absorb moisture fully and gives a better texture.
Can I make this dessert gluten-free?
Yes! You can easily make an Oreo Icebox Cake gluten-free by using gluten-free Oreos. The rest of the ingredients are naturally gluten-free, making it simple to adapt for those with dietary restrictions.
PrintMore Desserts & Appetizers Recipes
- Strawberry Crunch Cheesecake Brownies
- Apple Dapple Cake
- Cookie Monster Cookies
- Matcha Swiss Roll Cake with Black Sesame Mousse
- Charcuterie Cups
Did You Enjoy Making This Recipe? Please rate this recipe with ⭐⭐⭐⭐⭐ or leave a comment.
📖 Recipe Card

Oreo Icebox Cake
- Prep Time: 15 minutes
- Cook Time: No bake
- Total Time: 0 hours
- Yield: 9 servings 1x
- Category: Desserts & Appetizers
- Method: No bake
- Cuisine: American
Description
This Oreo Icebox Cake is a delightful dessert featuring layers of creamy whipped goodness, Oreo cookies, and easy preparation. Perfect for gatherings or a sweet treat at home!
Ingredients
- 48 oreo cookies
- 4 ounces cream cheese, softened
- 2 ½ cups (595 g) heavy whipping cream, cold
- ½ cup (62.5 g) confectioners' sugar
- 1 teaspoon vanilla extract
- Crushed Oreo cookies
Instructions
- Chill the bowl and whisk attachment of a stand mixer for 15 to 20 minutes.
- Beat the softened cream cheese in the chilled bowl until smooth.
- Incorporate the cold heavy whipping cream, confectioners’ sugar, and vanilla extract. Beat until stiff peaks form, but avoid overbeating.
- Spread a thin layer of the whipped cream mixture at the bottom of an 8×8-inch baking dish.
- Arrange one layer of Oreo cookies over the whipped cream, breaking some to fit as needed.
- Spread one-third of the remaining whipped cream mixture evenly on top of the cookies.
- Repeat the layering process twice more, finishing with a top layer of whipped cream.
- Sprinkle crushed Oreo cookies on top.
- Cover the dish tightly and refrigerate for at least 6 to 8 hours, or overnight, letting the cookies soften and absorb moisture.
- Slice and serve cold; for cleaner slices, freeze the cake for 20 to 30 minutes before cutting.
Notes
Ensure the cream cheese is fully softened for easy blending.
Consider using a larger dish to make a double batch for a crowd.
Feel free to mix in some chopped Oreos into the whipped cream for added texture.
Nutrition
- Serving Size: 1 slice
- Calories: 240
- Sugar: 15g
- Sodium: 160mg
- Fat: 15g
- Saturated Fat: 9g
- Unsaturated Fat: 6g
- Trans Fat: 0g
- Carbohydrates: 28g
- Fiber: 1g
- Protein: 3g
- Cholesterol: 30mg