Red, White and Blue Mini Cheesecakes

Red, White and Blue Mini Cheesecakes are the perfect sweet bite for summer celebrations. With their creamy and rich texture layered between light and crisp graham cracker crusts, they truly elevate any gathering into a memorable occasion. The vibrant colors make them a delightful addition to patriotic holidays like the Fourth of July, Memorial Day, or any festive barbecue. Think of these mini cheesecakes as individual treats filled with joy and a burst of flavor.
Table of Contents
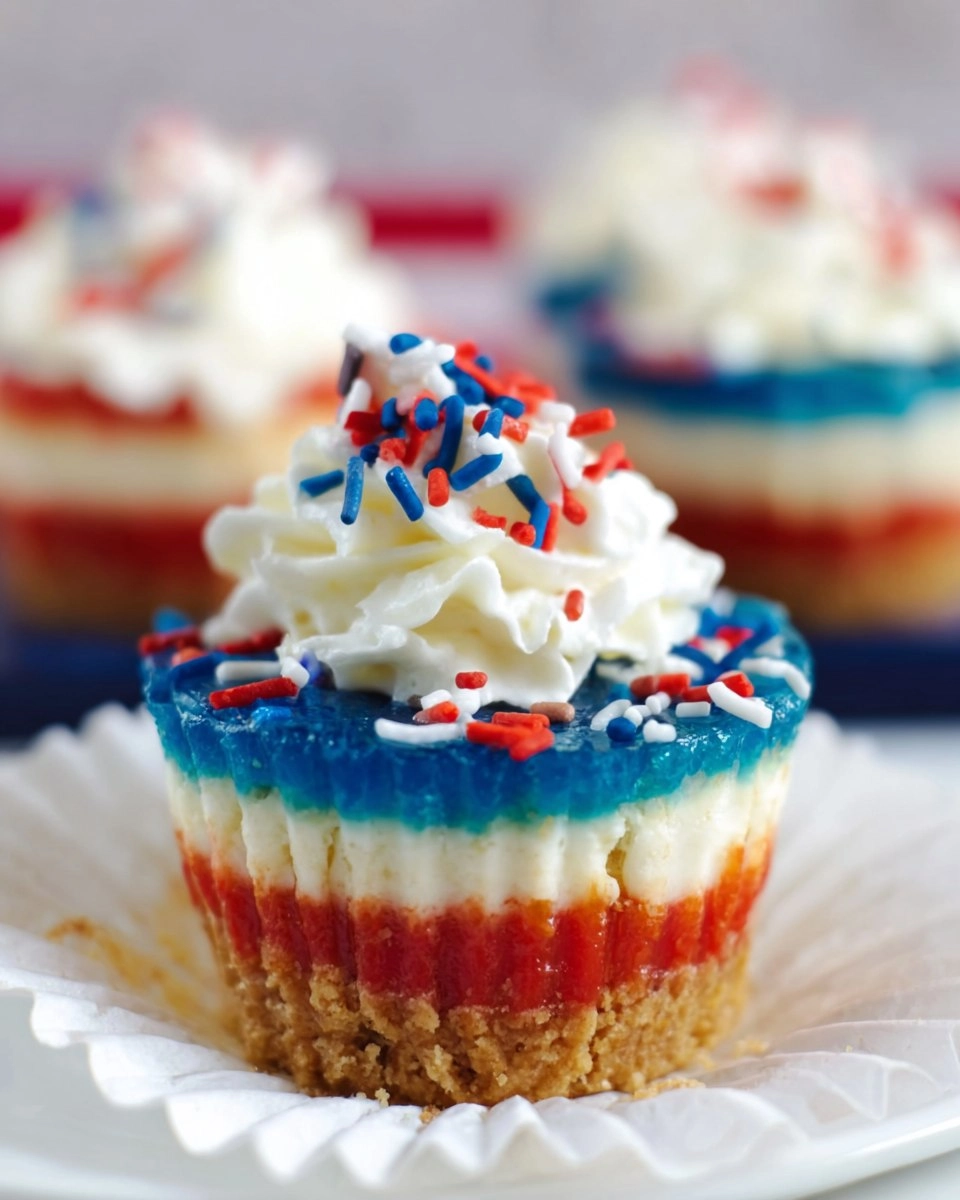
When I first made these delightful Red, White and Blue Mini Cheesecakes, I was hosting a casual get-together, and I needed a dessert that was both festive and easy to whip up. With the beautiful layers of red, white, and blue, these cheesecakes not only captured the eye but also won the hearts (and taste buds) of my friends. They were such a hit that I could barely keep them on the table long enough for everyone to enjoy! The creamy filling, perfectly complemented by the crunch of the crust, creates an experience that’s far superior to any store-bought option. So, whether you’re planning a holiday party or just want a fun treat to brighten your day, I invite you to try these mini cheesecakes. You won’t regret it!
Why You’ll Love This Recipe
- Simple & Quick: Available to create in under 45 minutes (plus chilling time), this recipe is easy on your schedule.
- Irresistible Flavor: Silky cream cheese and fluffy whipped cream combine to deliver a satisfyingly sweet experience.
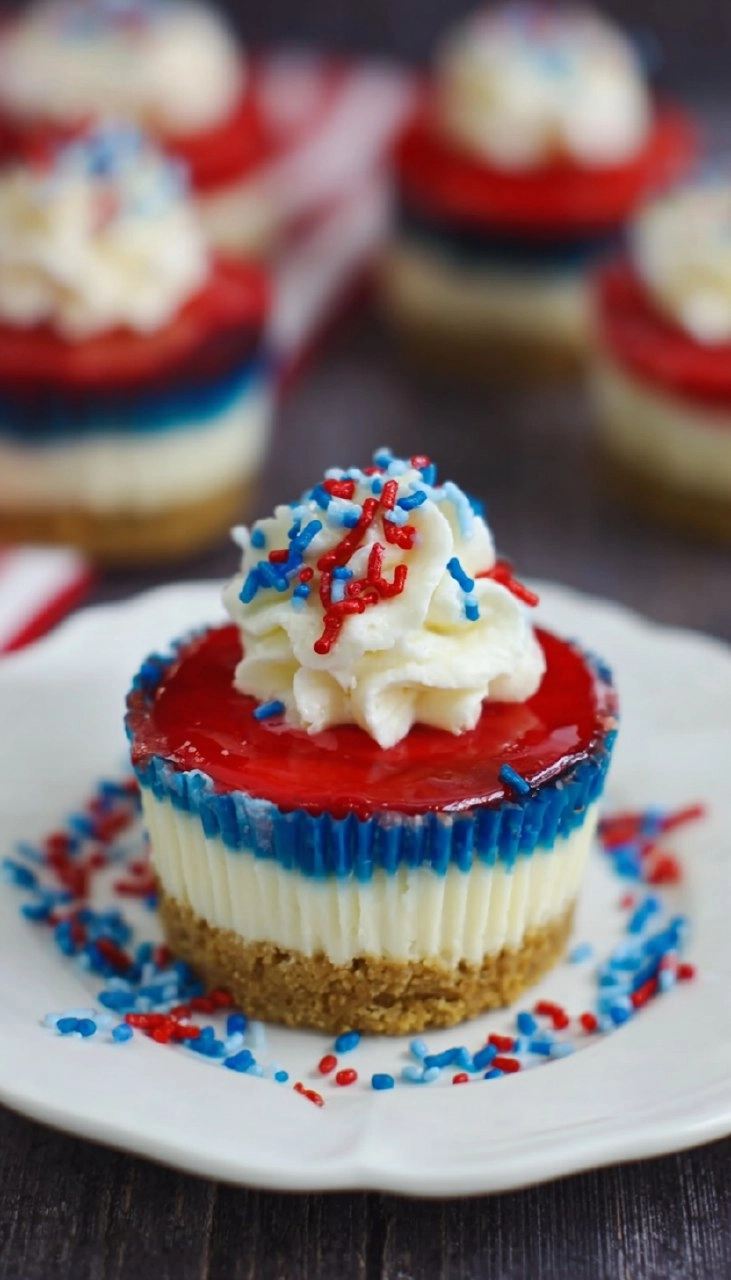
- Eye-Catching Appeal: The vibrant red and blue layers topped with whipped cream and sprinkles make them a showstopper.
- Flexible Serving: Ideal for any occasion—snack time, parties, or even a delightful surprise for dinner guests.
- Diet-Friendly Options: These cheesecakes can be made gluten-free with alternative crusts, suitable for more dietary needs.
Ingredients You’ll Need
- 1 ½ cups graham cracker crumbs: The foundation of your cheesecake crust. You can substitute with crushed gluten-free cookies for a gluten-free version.
- 2 tablespoons salted butter, melted: This helps bind the crust together and adds richness. Use unsalted if you prefer a milder flavor.
- 16 ounces cream cheese, room temperature: The star ingredient for that creamy texture. Allow it to soften to ensure smooth mixing.
- ¾ cup granulated sugar: Sweetens the cheesecake perfectly without overpowering it; avoid substitutes for the best flavor.
- 2 tablespoons all-purpose flour: Helps provide structure to the cheesecake filling but can be replaced with cornstarch for gluten-free options.
- ½ cup sour cream, room temperature: Adds a delightful tanginess that balances sweetness. You could use Greek yogurt for a healthier option.
- 1 teaspoon vanilla extract: For that familiar and comforting taste; always go for pure vanilla for the best flavor.
- 2 large eggs: Essential for binding the ingredients together and giving the filling its soft texture. Make sure they’re at room temperature.
- 2 drops red gel food coloring: Brings a vibrant hue to one layer; gel is preferred to avoid excess moisture.
- 2 drops blue gel food coloring: Just like the red, this gives you beautiful blue layers.
- 1 cup heavy whipping cream, cold: For making the heavenly whipped topping; it needs to be chilled for the best results.
- 6 tablespoons powdered sugar: Sweetens the whipped cream without added grittiness; natural sweetness from the cream complements it beautifully.
- Sprinkles or flags for decoration: Add some fun and festivity to your mini cheesecakes.
How to Make Red, White and Blue Mini Cheesecakes
Preheat your oven: Begin by preheating your oven to 325°F. Line a 12-cup muffin tin with cupcake liners, and lightly spray them with non-stick baking spray.
Make the crust: In a mixing bowl, combine 1 ½ cups of graham cracker crumbs with 2 tablespoons of melted salted butter. Divide the mixture evenly among the 12 cupcake liners and press it firmly into the bottoms. Bake for just 5 minutes, then remove from the oven and let cool slightly.
Prepare the cheesecake filling: Lower the oven temperature to 300°F. In a large bowl, mix together 16 ounces of cream cheese, ¾ cup of granulated sugar, and 2 tablespoons of all-purpose flour until creamy. Then add ½ cup of sour cream and 1 teaspoon of vanilla extract, beating until well-combined—scrape down the sides of the bowl as needed.
Incorporate the eggs: Beat in 2 large eggs one at a time, ensuring each is fully mixed before adding the next. The mixture should be smooth and fluffy.
Color the batter: Divide the cheesecake batter into three bowls. Leave one bowl plain, tint one with 2 drops of red gel food coloring, and the other with 2 drops of blue gel food coloring.
Layer the batters: Start with about a tablespoon of blue batter in each cupcake liner, making sure you distribute it evenly. Then add a tablespoon of the white batter, followed by a tablespoon of the red on top.
Bake the cheesecakes: Bake in your preheated oven for about 15 minutes. Once done, turn off the oven but leave the cheesecakes inside for an additional 10 minutes with the door closed.
Cool down: After baking, let the cheesecakes cool in the muffin tin for about 20 minutes on a wire rack. Then transfer them to the fridge to chill completely before removing them from the tins.
Whip the cream: For the whipped topping, add 1 cup of cold heavy whipping cream and 6 tablespoons of powdered sugar to a mixing bowl. Whip on high speed until stiff peaks form, and then pipe this cream onto the tops of your cheesecakes.
Garnish and serve: Finish off by topping your Mini Cheesecakes with sprinkles or small flags for that festive flair. Store in the fridge, best enjoyed within 3 days.
Storing & Reheating
Store your Red, White and Blue Mini Cheesecakes in an airtight container in the refrigerator to keep them fresh for up to 3 days. If you need to store them longer, you can freeze them for up to 3 months. Just ensure they’re carefully wrapped or in a proper freezer-safe container. When you’re ready to enjoy them again, let them thaw in the fridge overnight—texture might soften but flavor remains delightful.
Chef’s Helpful Tips
- Use room temperature cream cheese and eggs for a smoother batter that blends easily without lumps.
- Always pre-bake the crust for optimal crunch; letting it cool slightly before adding the filling helps prevent sogginess.
- If your whipped cream isn’t forming stiff peaks, ensure your bowl and beaters are cold; this can greatly enhance volume and stability.
- Experiment with flavoring options; a touch of lemon zest or almond extract can elevate this already delightful recipe.
- Blend the colored batters gently to maintain their vibrant hues and layers—don’t mix too vigorously!
The balance of sweet, creamy flavors and the fun presentation makes this recipe a winner for any occasion. These mini cheesecakes are not just treats; they’re celebrations in every bite! Trust me, you’ll enjoy bringing a smile to everyone’s face with each delightful layer.
Recipe FAQs
How long do these mini cheesecakes need to chill?
After baking, allow the cheesecakes to cool for about 20 minutes before refrigerating. They need at least 4 hours in the fridge to set well, so plan ahead if you’re making these for an event.
Can I make this recipe in advance?
Absolutely! These mini cheesecakes can be made a day or two in advance. Just keep them stored in the refrigerator to maintain freshness and taste.
What if I can’t find gel food coloring?
If gel food coloring isn’t available, liquid food coloring can be a substitute. However, you might need to use more, which could slightly affect the consistency of your batter.
Can I use an alternative crust?
Definitely! If you’re looking for something different or need a gluten-free option, try crushed gluten-free cookies or chocolate wafer cookies as substitutes for traditional graham crackers.
PrintMore Desserts & Appetizers Recipes
- Air Fryer Mini Peach Cobbler
- High-Protein Fried Pickle Dip (Viral Recipe)
- Pimento Cheese
- The Best Vanilla Cake
- Crockpot Onion Dip
Did You Enjoy Making This Recipe? Please rate this recipe with ⭐⭐⭐⭐⭐ or leave a comment.
📖 Recipe Card

Red, White and Blue Mini Cheesecakes
- Prep Time: 20 minutes
- Cook Time: 25 minutes
- Total Time: 45 minutes
- Yield: 12 servings 1x
- Category: Desserts
- Method: Baking
- Cuisine: American
Description
These Red, White and Blue Mini Cheesecakes offer a delightful blend of cream cheese and nostalgia, perfect for parties or festive gatherings. They’re easy to make and visually stunning, featuring layers of red, white, and blue flavors that everyone will love. Enjoy the sweet taste of summer with this simple, homemade treat!
Ingredients
- 1 ½ cups graham cracker crumbs
- 2 tablespoons salted butter, melted
- 16 ounces cream cheese, room temperature
- ¾ cup granulated sugar
- 2 tablespoons all-purpose flour
- ½ cup sour cream, room temperature
- 1 teaspoon vanilla extract
- 2 large eggs
- 2 drops red gel food coloring
- 2 drops blue gel food coloring
- 1 cup heavy whipping cream, cold
- 6 tablespoons powdered sugar
- Sprinkles or flags for decoration
Instructions
- Preheat your oven to 325°F and line a 12-cup muffin tin with cupcake liners, spraying them with non-stick baking spray.
- Blend the graham cracker crumbs with melted butter and evenly distribute this mixture into the cupcake liners, pressing it down. Bake for 5 minutes, then cool in the tin.
- Lower the oven temperature to 300°F. In a large bowl, combine cream cheese, sugar, and flour, mixing well. Add sour cream and vanilla, beating until smooth.
- Incorporate the eggs one at a time, mixing thoroughly after each addition.
- Split the batter into three bowls; leave one white and color one red and another blue.
- Layer the colored batters into the crusts, starting with about a tablespoon of blue batter, followed by white, and ending with red, ensuring even distribution.
- Bake for about 15 minutes, then turn off the oven and let them sit inside for another 10 minutes without opening the door.
- Cool the cheesecakes in the muffin tin for about 20 minutes, then transfer them to the fridge to chill until they are firm.
- For the whipped cream, whip the cold heavy cream with powdered sugar until stiff peaks form and pipe it onto the cheesecakes, finishing with sprinkles and a flag.
- Store the cheesecakes in an airtight container in the fridge for up to 3 days.
Notes
Ensure all ingredients are at room temperature for the best texture.
These mini cheesecakes can be assembled a day in advance—just add whipped cream and decorations right before serving.
Feel free to customize toppings with different colors of sprinkles or fruit for extra flair.
Nutrition
- Serving Size: 1 cheesecake
- Calories: 250
- Sugar: 12g
- Sodium: 240mg
- Fat: 16g
- Saturated Fat: 10g
- Unsaturated Fat: 4g
- Trans Fat: 0g
- Carbohydrates: 24g
- Fiber: 1g
- Protein: 3g
- Cholesterol: 60mg